Building a 2M Tape Measure Yagi
I always enjoy a good project, so when I came across what looked like a good beginner antenna project I couldn’t resist.
I had heard a bit about foxhunting, an activity where hams use various methods to locate a hidden transmitter, and came across a local group, the NEMassFoxHunters, who hides transmitters throughout the summer in my general vacinity. Their page led me to another that described some fo the basic equipment and plans to build a directional antenna, using a tape measure and some pvc pipe.
Rather than lead through the process and materials here, I’ll link you right to the source at Joe Leggio, WB2HOL’s site here.
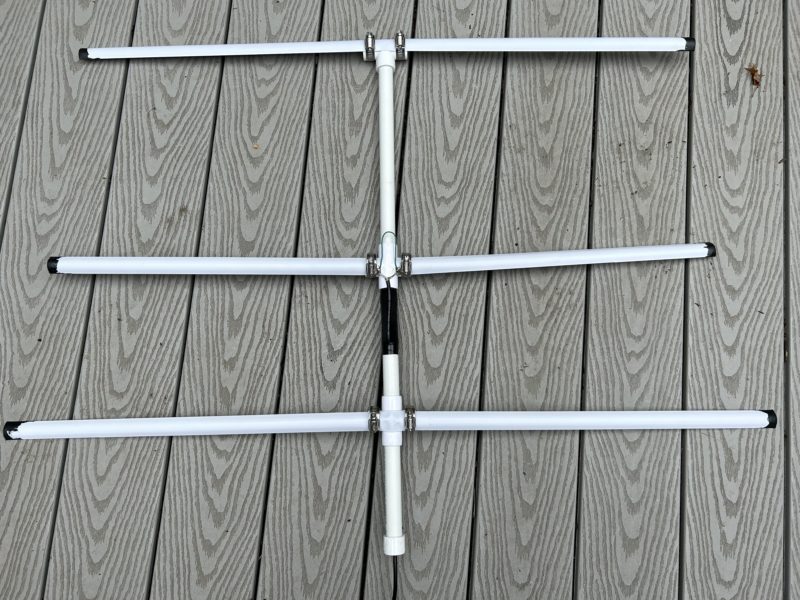
The basic process is to construct a boom and cross pieces out of 1/2 inch (or 3/4 inch) PVC piping, then cut sections of 1 inch metal tape measure to form the elements. This model is a simple 3 element yagi.
Some modifications I made to the design were to dip the ends of my tape measure in liquid tape for safety and to drill a hole into the pvc at a angle beteeen the driven element and the refelctor to allow me to run my cable inside the handle. I used a section of an existing BNC cable that had suitable connector for the radio I plan to use. I wrapped the cable with electrical tape to hold it nicely in place and added an drilled end cap to the handle for aesthetics.
All in I probably spent about 25 dollars in parts, including extra pipe fittings and hose clamps I’ll likely use for future projects. Tests with a NanoVNO appear to show decent SWR in the 146 Mhz range (as planned) but does waiver quite a bit when the antenna is being moved and flexes. I’d also like to get my reflector a bit flatter, as it buckled a bit of the tee cross. The largest problem I faced was that the first piece of RG58 I attempted to use was completely unsolderable. Apparently, the shielding had some sort of anti-solder coating that would not burn off or take solder. Once I found a new piece of cable, the project was very straightforward.
I’m looking forward to trying it out at the next foxhunt when I have the chance! In the meantime, I am looking into RF attenuators — a couple possible options – one with resistors and one with an 4mhz offset – I’ll let you know what I wind up with.
2 Commments
Comments are closed.