Replacing The UHF Final Amp on Yaesu FT-90R
I recently wrote about making DIY Programming cable for the FT-90. Once I had it programmed I was able to do some testing. One thing I noticed is that this radio has great sensitivity – I was quickly picking up clear signals from repeaters I used to struggle make out over static. One other thing I noticed was that the radio did not transmit on UHF. The VHF seemed pretty close to spec for transmit power, but UHF was flat.
I opened up the radio to investigate and found that the radio has two separate final amplifiers one for VHF and one for UHF. Since everything else seemed to work, I suspected the previous owner had burned out the UHF final using the wrong antenna. This radio came to me off an auction has ‘untested,’ so I wasn’t too surprised that there was something not working. I always love a good project, so I set about to see if I could fix it. With any luck *only* the final amplifier had been damaged.
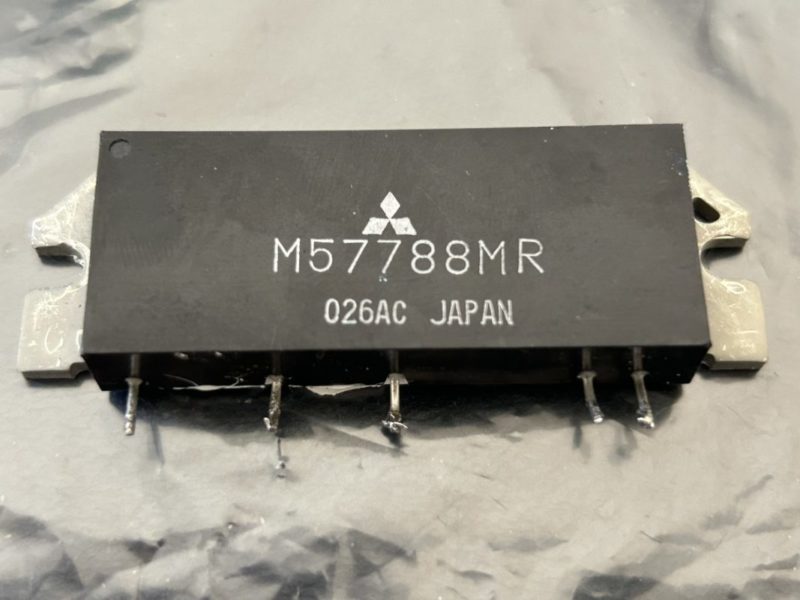
The amplifier for the UHF side is a Mistubishi M57788MR. A few googles turned up listings on radio supplier sites that were either out of stock or prohibitively expensive ($100+) – not worth it for an old fixer-upper. I turned to eBay and discovered a seller with exactly this part based out of Slovenia for only US $30. While I haven’t tried to order parts from Europe before the price was right, so I gave it try.
A couple weeks later the part arrived and I was ready to try my hand at replacing. But I did also realize I needed some thermal paste for the heatsink as the original paste was very dried out and would not be reusable. After a little searching for different types, I landed on a white Z9 compound from GC which was listed on several radio related sites. I’m not super clear if and how it’s different from some of the other compounds you see all over for CPU use… If you know more about this or if you would have made a different selection – please feel free to post a comment.
First, out with the old. Unscrewed the mounting screws on the chip and began desoldering the connectors, carefully lifting the chip as I went. Then a little clean up of the old paste with a few Q-tips and it was ready for the new chip. I had to trim the leads to fit the board – about 7.5mm and laid the chip in place with a fresh coat of heat sink compound. Resoldering was quick and I tightened up the retaining screws to ensure good contact with the heatsink.
Once I had the unit all closed up, it was time to see if I had fixed it! Using a Surecom SW-102, I was able to measure transmitted power into a dummy load as well as an antenna. Measured on UHF at about 27W (out of 35W specificiation) so that seems pretty reasonable. Excited to get this radio into full working order and try to make a few contacts. I’ll keep you posted on how it goes!